Tuesday, March 26, 2013

On Opening a 2nd Shop, and Learning from Mistakes

A few years ago, I never would have dreamed that I would open an online store.  Or any kind of store really.  It just wasn't a path I had ever considered for myself.  But life has a funny way of bringing you to where you most need to be, and for whatever reason, my path led me to Etsy.  Now, Little Hill Jewelry is fast approaching its one year Etsy-versary (April 12th), and I'm just a teeny tiny ways off from my 100th item sold.

One of my newest additions, found in my Little Hill Jewelry shop


It's been a lot of hard work, and it's been really disappointing at times, but looking back, I'm proud of what I've accomplished.  And looking forward, I'm hopeful and excited for where my path might take me next.

A few weeks ago, I decided to open a second shop.  I figured things were going fairly well with my first shop, why not give it a go.  Well, my second shop's been open for 3 days, and while I've already had my first sale, it's been a rocky start.

One of my favorite beading patterns from my new shop, LH Beading Patterns


Originally, LH Beading Patterns was going to be a collaborative effort between myself and another young woman.  We were going to share the promotion of the shop, and both add patterns, but as it got closer and closer to being time to open, it looked less and less like she would be sticking around.  Finally, the day before we were to open up shop, she decided to bail, which was a super bummer.  She said she felt so bad about leaving me in the lurch that she wanted me to have her patterns, to do with as I saw fit.  This (I thought) was so incredibly generous of her, and more than made up for her bailing at the last minute.

It turns out that was more of a curse than a blessing.  I won't go into details, mostly because it's completely humiliating, but it turns out her patterns were something less than original.  I, having no clue, posted her patterns for sale in my shop.  Imagine my utter embarrassment when I got that message.  I was in tears when I realized what was going on, and very, very close to just scrapping the new shop all together.

Thankfully, the wonderfully kind Etsians who pointed out the problem were unbelievably gracious and understanding.  So, while I just wanted the earth the swallow me whole, some little voice inside me thought "Maybe I can still do this."  It took me awhile, but I sat down and deleted everything that I could remember her creating.  I have no idea if there were actual originals in the stack of patterns I chucked, but all things considered, I guess I don't much care.

This whole experience has taught me (probably in the hardest way possible) that good friends don't necessarily make good business partners, and that there is so much validity to the advice my Mother gave me all those years ago: "Trust, but verify."  This lapse in judgement is something that I'll be kicking myself over for a long time to come.  I can't seem to keep my mind away from thoughts like "If I had just..." or "What if I had..."

Another of my favorites, this pattern's design evokes a sense of calmness and serenity for me.


So now that I've shared one of my most embarrassing business errors, maybe you're wondering; what's the point?  Why tell even more people about this humiliating experience?  Well, the truth is, I wasn't going to.  I was all set to just sweep it under the rug, and push it to the back of my mind, and to just move on.  But I was thinking today that it's important to acknowledge our mistakes.  Not to embarrass ourselves further, but to own them, accept them, and to learn from them. 

The point is that we all screw up.  It's not something you hear a lot about really, unless it was some kind of epic catastrophe.  Maybe it doesn't happen often, and maybe not in big ways, but I think that if you're in business long enough, mistakes are going to happen, things are going to go awry, and the thought of just sacking the whole venture will inevitably cross every business person's mind.  But our mistakes aren't what define our businesses, or our lives.  How we repair the damage does. How we react and respond does. How we move forward does. 

Moving forward, I'll know to be wary of mixing business and friendship, and I'll be more careful to make sure I don't end up with a face full of mud.  I'll also always remember how kind, patient, and understanding complete strangers were to me, and how that ounce of compassion gave me the courage I needed to move on down my path.

And I just want to say, if you mess up, it doesn't have to be the end of the world.  Sometimes things go wrong, which is practically the story of my life, but those wrong turns can sometimes lead you to the right place, to the place you were meant to be all along.  

Feel free to stop by my new shop, LH Beading Patterns, and have a look around.  Now through April 12th, you can enter coupon code WELCOME during checkout and save $2 off any one pattern.

Come check out the new shop, and save $2 off any 1 pattern now through April 12th, 2013


Happy beading, and have a great week!

Tuesday, March 19, 2013

Springtime and Cheesecake

 Cheesecake?  Yes, cheesecake, because not every entry can be about jewelry =P

A quick update...Things are going pretty well for Little Hill Jewelry.  I'm still terrible at remembering to update this blog, so I'm sure there are tons of things that have gone on that I should mention, like my gifting a few celebrities, and revamping my website. I'm also working on some new items for spring/summer, but you can see those sneak peeks over on my Facebook page.

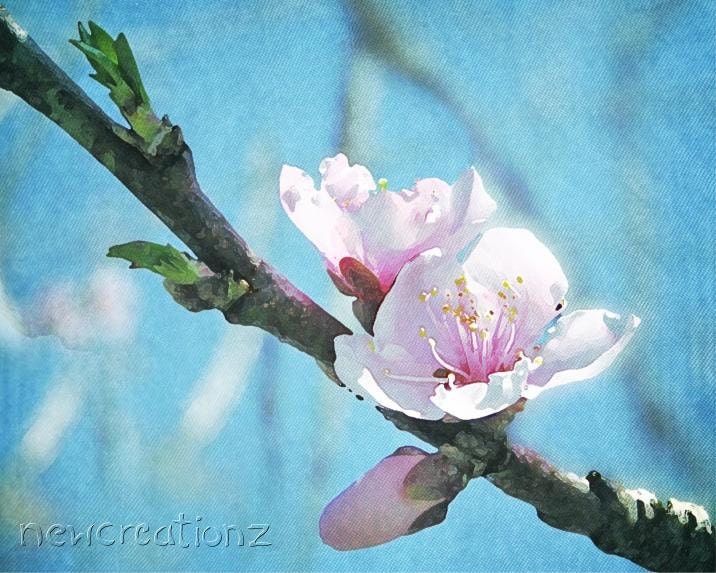
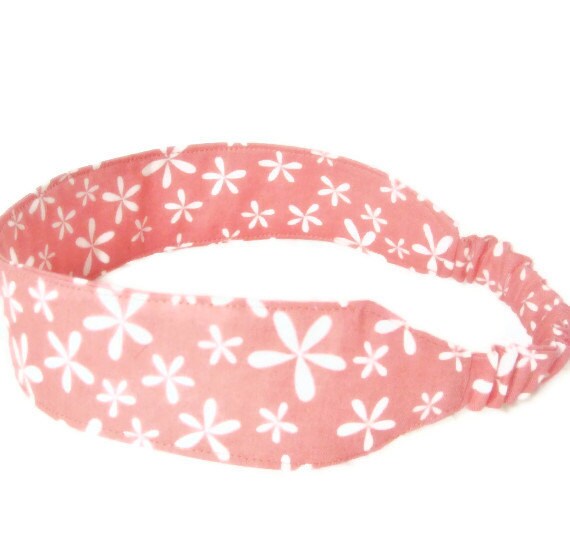
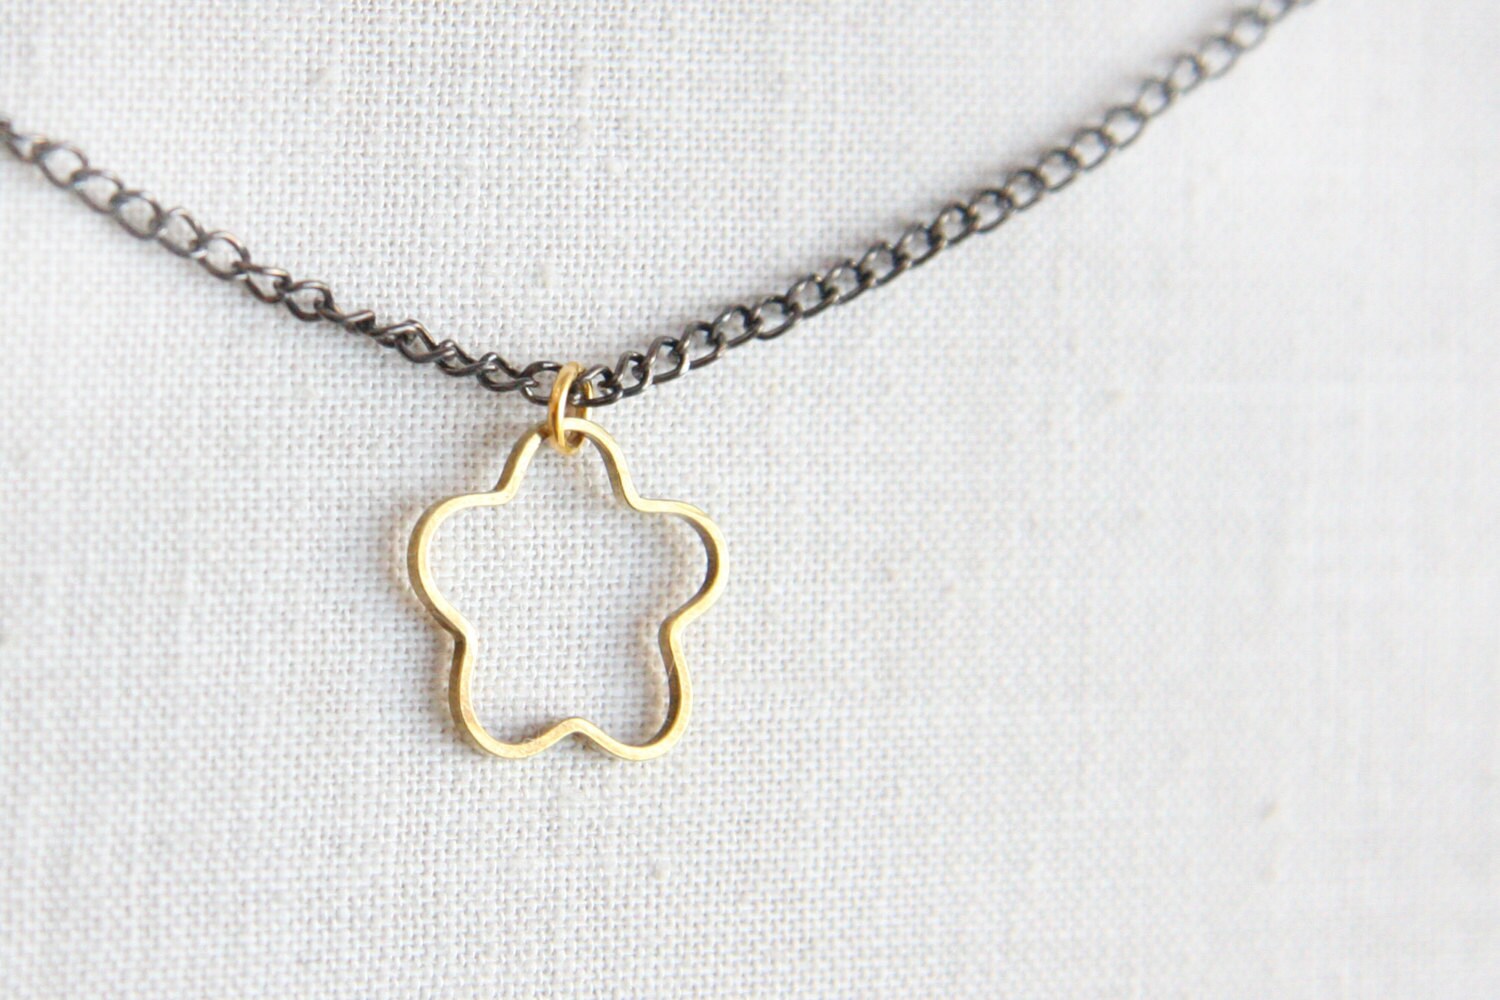
It's snowing here in Vermont, which is cool and everything, but the first day of spring is like, a day away, and we've got 8 inches of icy, wet snow on the ground.  Thank goodness for the internet, and my awesome Promotional Frenzy team members over on Etsy--check out some of their spring themed artwork!

This is a stunning photo of Cherry Blossoms in Snow from HausofAriella 
A wonderful print of a blossom against blue sky from NewCreatioNZ
A pretty floral headband from NewEnglandQuilter
And a beautiful brass flower pendant from KapKaDesign


So I thought I'd change things up a little this post, and share my new and ridicilously fantabulous recipe for cheesecake.  Yes, I said cheesecake.  I'm obsessed with cheesecake, but don't eat it often, because desserts aren't generally the healthiest thing on the planet.  Now, don't get me wrong, this cheesecake probably shouldn't take up residence in your daily food pyramid, but it's just perfect for a special treat that won't weigh you down.

I wish I'd thought of it while I was cooking and snapped a few photos, but food-blogger I'm not, so it didn't occur to me.  I know reading a recipe with no pictures is endlessly boring, but believe you me, it's totally worth it!  I know, I know, enough babbling on...here's the recipe!


Totally Awesome and Almost Fat/Sugar Free Lemon Cheesecake

Ingredients:
For the crust:         13/4 C Nilla Waffer Cookies, crushed fine
                              ¼ C unsalted butter, melted
For the Filling:      (3) 8oz packages of fat free cream cheese
                              1C fat free sour cream
                              2C Splenda (or other preferred sugar substitute)
                              3 large eggs
                              2t lemon zest
                              2T lemon juice
For the Topping:   11/2t lemon zest
                              6T lemon juice
                              1 large egg, plus 1 large egg yolk
                              1/2C Splenda (or preferred sugar substitute)
                              2T unsalted butter, cut into small bits

Instructions:
  1. Preheat oven to 325o
  2. Mix cookie crumbs and melted butter until crumbs are evenly coated.  Press crumbs evenly into the bottom of a prepared 9” springform pan. 
    • Don’t have one?  No big deal, you can really use any pan you like so long as it’s comparable in size.  I like the springform pan because the sides pop off, which makes removing the cheesecake a breeze.  If you’re going to use just a regular 9x9” square pan, I suggest lining it with parchment paper, just to save yourself headaches down the line.
  3. Bake crust in preheated oven for 8-10 minutes (I left mine in for 12)
  4. Remove pan from oven and let cool on a wire rack while you prepare the filling
  5. Using a hand or stand mixer, cream together the cream cheese and sour cream. 
    • This is way easier to do if the cream cheese has been hanging out on the counter for a bit.  I took mine out about an hour before I got started, and it was the perfect consistency.
  6. Add eggs one at a time, mixing until just blended.  Then gradually add the Splenda, mixing well.  Finally, add the lemon zest and juice.
  7. Pour filling into the crust and smooth.  Now you’re ready to bake it!
    • Okay, so here’s the thing.  Even full fat/sugar cheesecakes can crack on the top while their baking.  It’s just what cheesecakes do.  By changing the chemistry of the cheesecake (fat free and sugar substitutes), this is actually way more likely to happen.  Fear not, there is a trick to help prevent this!   
    • When you put your cheesecake in the oven to bake, add a small pan of water on another rack.  I bake my cheesecake on the middle rack, with a Pyrex dish with about 1 ½ cups of water on the rack above it.  This creates a moist heat environment, which helps keep the top of your cheesecake from getting all dry and cracked.  But, ya know, even if it does crack, it’s not like it effects how yummy this cheesecake is :)
  8. Bake cheesecake.  How long is really going to depend on your oven, and your environment, and how the food gods are feeling that day.  Generally speaking, it’s going to take between 1 hour 25 minutes and 1 hour 45 minutes.   
    • Normally with cheesecakes, you take it out when the tops starts to get that lovely cream and brown glow to it.  Since we’re using Spelnda, that’s not going to happen (Splenda doesn’t caramelize like sugar), so you have to keep a really close eye on it.   
    • The cheesecake is done when the top looks dry and the center is only slightly jiggle-y when you gently shake the pan.  It’s part science, but mostly magic and instinct.  The cheesecake is going to continue to set up after you take it out of the oven, so a little jiggle is a good thing.
  9. Once the cheesecake is done, take it out and let it hang out on a wire rack while you make the topping.
  10. The topping is basically lemon curd.  It’s tart, sweet, and lemon-y, and it’s not strictly necessary to make this cheesecake, but it is a great finishing touch.
  11. Set up a double boiler.   
    • If you don’t have one, you can improvise like I do and just set a heat safe bowl over a pan of simmering water.  Make sure the bowl doesn’t touch the water, and that steam can escape, and you’re all set.
  12. Add the zest, juice, Splenda, egg, and egg yolk to the bowl and set over simmering water.  Whisk until the mixture is hot and frothy, about 5 minutes.  You really have to whisk constantly to keep the eggs from curdling. 
  13. Once the mixture is hot and frothy, gradually add the butter bits, whisking until each addition melts.  Once all the butter is added, whisk constantly for about 7 minutes until the mixture is smooth, glossy and coats the back of a spoon.  Remove from heat and cool for about 30 minutes, stirring occasionally.
  14. Remove the cheesecake from its pan to a serving plate.  If using a springform pan, run a thin knife around the edge to loosen, and then just pop off the sides, then gently slide the cheesecake onto a flat plate.
  15. Top the cheesecake with the lemon curd.   
    • Be sure to do a little taste test of the topping before slathering the cheesecake with it.  It is lemon curd after all, and can be a little tart.  I only ended up using about 2/3rds of the topping spread thinly along the top.
  16. Let the topped cheesecake hang out at room temperature for another 30-45 minutes, and then place in the fridge for several hours, or overnight.
  17. I totally didn’t wait several hours.  More like—barely an hour.  You just want to chill the cheesecake and make sure everything is nice and set before you cut into it.  Try and hold off as long as you can.
  18. Top with fresh raspberries for a fresh burst of color and dig in!  The only fat is from the butter in the crust and topping, and the only sugar is from the cookie crumbs in the crust, making this almost fat and sugar free, and totally, deliciously, diet friendly.
And that’s all there is to it.  Try it out, and let me know in the comments what you think!
Ta ta for now :)

Sunday, December 23, 2012

Call for Artwork!! (And Happy Holidays!!)

So, first and foremost, HAPPY HOLIDAYS!!  Whatever you celebrate, or don't, I hope this time of year is filled with peace, love, and joy for you and yours :)

I have been BUSY this season, and I'm loving every minute.  Recently, I premiered some brand new pieces in my shop: Etched Copper and Brass Cuff Bracelets.  I'm really excited to be offering these pieces.  They've been a blast to make, and I am just in love with how they look and feel.  Apparently I'm not the only one either--about 5 minutes after listing my favorite wide cuff in my Etsy Shop, a very nice gentleman from Georgia snatched it up.  This is my current favorite, a brass cuff with an organic crackled texture on the surface:
Brass Cuff
My plan is to make many many more, which brings me to the main point of my post :)

CALLING ALL ARTISTS!!

I want to feature your artwork on one (or more) of my cuff bracelets!

I don't care if you draw, paint, or make graphics on the computer.  I'm just looking for some awesome images to transfer onto metal.

Here's the skinny.  I use a process called acid etching to make the cuff bracelets.  Part of the process is transferring toner rich images from paper to metal to act as a resist.  All the areas of the metal covered with toner (or paint, or wax, etc, etc...) will be protected from the etching solution.  All the exposed areas will get cut away, creating recessed areas and awesome texture.  In the cuff above, all the bright brass areas were protected from the etching solution, while the dark areas were exposed.  Pretty cool, right?

I've managed to come up with some pretty cool designs that I really love, but now I'm interested in what you all might come up with.  Just about anything you can think up can be used; the only real requirement is that the image has to be black and white.  JUST black and white, no gray areas.  The black areas are what will protect the metal, and gray just doesn't hold up.


Crisp images like this one are perfect.  There can be a lot of detail, or not, so long as the black lines are strong and dark, and the white areas are crisp and clean. 

Images like the one below won't work because the gray shaded areas won't be protected well during the etching process.  Thin black lines are also not an ideal fit for this project.


Getting the idea?  I hope so.  Anyway, anyone who wants to is more than welcome to submit artwork.  I'd prefer high quality digital files since the crisper the image, the crisper the transfer, but I can generally make whatever you want to send in work.

What size should the image be?
  • Full size cuffs are made from strips of metal that are 6 inches long, and from 1/2 to 2 inches wide.  
  • Half size cuffs are about 2 1/2 to 3 inches long, and approximately 1 inch wide.
  • Ring stock is about 3 inches long, and 1/4 to 1/2 inch wide.
  • Earring stock is about 1/4 to 1/2 inch wide, and can be up to 2 inches long.

It'd be awesome if you could size your images to fit these dimensions, because if I resize them, they could become less crisp, which would be a big bummer.

What do I get in return for sharing my super cool artwork?
Everyone who submits a piece of art work (whether or not I use it) will be entered to win a gift certificate to use in my shop.  And if I end up using your art, I'll credit you in the item description, on FB, and on the care card that's included with the piece featuring your work.  I'll also give you first dibs on whatever jewelry I make using your design.

Sounds great!  Where do I send my stuff?
Email it to me!  Send all submissions to jewelry_gal85@yahoo.com
Please put "Artwork Submission" in the subject line so I know you aren't spam.  Also, include your name, email address, and website (if you have one) with each submission. 
Just about any file type should work, but I'd prefer a .jpeg  or .png file.  PDFs, Word documents, and high definition scans of hand drawn images are fine as well.

The Fine Print
I'll be drawing the gift certificate winner on Friday, January 25th, 2013.  You can submit as many images as you'd like, but your name will only be entered into the drawing once.

If you're sending me artwork, it must be your own.  Seriously, don't steal images from the web and say it's yours, that's called copyright infringement and it's against the law.  Plus, how would you feel if someone stole your stuff?  So, original work only, please.  You CAN use open source materials, but original is (almost) always better.  By submitting artwork to me, you are certifying that you have the right to use and distribute it.

By sending in artwork, you are agreeing to allow me to use (or not use) the image as I see fit.  This means the image may be re-sized, reshaped, or re-purposed as needed to fit the project.  It also means you are giving me the rights to sell any and all projects featuring your artwork with no financial obligation to you, other than what's mentioned above.

Submissions constitutes a binding contract for non-exclusive rights to your image(s).  You may sell, distribute, and otherwise share your image(s) however you like, though it'd be great if you didn't go handing them out to other jewelry artists.

And that's that.  I can't wait to see what you all come up with!  Be sure to stay tuned.  I've got a TON of exciting new projects in mind for the new year!

Happy Holidays!

-Heather

Saturday, December 1, 2012

The Holiday's are Here

So, once again, I've been terribly neglectful of this poor blog.  Eventually I'll get with the program and remember to post here more than once every month or so.  Honest, I will.

Thought I'd post a quick update on how things are going.  The holiday season is most definitely in full swing, and my Etsy business is doing fairly well for its first year out.  Black Friday/Cyber Monday sales more than doubled my in shop sales in months prior.  I went from 12 to 29 sales in 4 days :)  And one of those orders was fairly large, which is always nice.

Here are the 2 most popular items so far:
Mixed Set of 4 Silver Stacking Rings

Set of 3 Textured Copper Rings


I did the math on Tuesday and realized that if I kept selling at the same pace (2-3 sales/day) I would have over 100 sales by the end of the year.  But, naturally, that volume of sales doesn't seem to be in the cards for me, so I've set a goal of 50 sales by year's end instead.  That's only 31 more sales.  Totally do-able.  I hope.  You know what they say about shooting for the moon...

Even with all the activity and excitement in my shop, I've been spending a lot of time working on new projects.  I haven't decided if I'm going to launch these new items before or after the holidays, but either way I'm wicked excited about them.  I recently taught myself how to etch on metal, and I'm totally in love with the results I've been getting.  I thought etching would be a big complicated process, but as it turns out, it's actually really easy to do.  With some copper and brass blanks, a laser printer, and some etching solution, awesome things are possible.

Post Etching
 This is a brass blank that's destined to be a cuff bracelet by the time I'm through.  In the photo above, you can see the piece fresh from the etching solution.  The black marks you see are the resist--the material applied to the metal to protect it from the etching solution.  The areas that don't have any black marks become recessed areas, which you can see much more clearly in the close up photo below.

Close up before cleaning

Close up after cleaning
 In the picture above, you can see the raised areas still bright and shiny.  These areas are where the resist protected the metal.  The lower areas have a neat texture to them, as well as a slightly different coloring.  The picture below is a ring blank fresh from the etching solution with the resist just cleaned off.

Copper Ring blank post etching
 And then, with a little magic, a little soldering, and a little wax, this is what I decided to use the ring blank for.  After forming the ring, I used a sharpie marker to color in the recessed areas, bringing a little more depth and definition to the awesomely cool texture.  Then I cleaned things up and buffed the whole ring with a little bit of Renaissance Wax.  The wax will help keep the ring from tarnishing, and from turning peoples skin green.
Copper Wide Band Ring using the etched ring blank


Angled Front View of the "All You Need is Love" Copper Cuff

And last but not least, here's one of the finished cuffs.  This was the only cuff I attempted to put any writing on.  It says: "All you need in love."  I wish I had left the metal in the solution a little bit longer to give the writing a little more depth, but I'm pretty pleased with how it turned out.

Angled Right View of the "All You Need is Love" Copper Cuff

As with any new project, I still have a few kinks to work out, but I'm really excited with how things are going.  I've had so much fun experimenting with new techniques in metal working, and there's still so much more to try.

Since I'm notoriously terrible at remembering to update here very often, I end this post by wishing you all happy holidays from Little Hill Jewelry!


Saturday, October 27, 2012

On Facebook

These FB changes are definitely a bummer, and they have a huge impact on who gets seen where, and how often.  I read an article the other day that only something like 14% of the people who've liked our business pages see anything we post.  14 percent.  Seriously.  That means that if you have 100 likes on your page, 14 people will see your post.  To get 100 people to see your post, you would need over 700 likes.

So, we can still use FB for free, but we have to work exponentially harder for the same returns.  That's not always possible, I mean, we're small businesses, and we have lives offline.  But there are a few things you can do to get back some of your reach on Facebook.

1) Post relevant content often. 

  • That doesn't mean fill people's news feeds with spamy pointless posts, it just means posting a few times a day.  Each time you post, a different percentage of your followers has a chance to see you pop up in their news feed.  Pictures are eye catching, questions are engaging, and status updates are informative.  This kind of posting engages your fan base, and keeps your name in their mind, which can translate to sales.

2) Be sure to link to your Etsy shop often to drive traffic that way. 
  • Announce new listings each time you post one (unless your listing more than 3 things at a time, then announce sparingly).  Consider including a link to an item in the photo caption.  Promote sales and coupon codes.  Even if you just include a link to your shop in an occasional regular status update, that could potentially translate to traffic for your shop.

3) Consider running "referral" contests. 
  • Encourage followers to share you photos and updates.  Be active daily on FB.  And the same rules apply--the more people who like your page, the more people see you.  It's totally worth it to work for those likes.  If you haven't yet, consider taking advantage of FB Ads that are free for first time users (up to $50 I think).  That will boost your page likes quickly, and help you reach more people.
It may be a lot more work to get seen on FB these days, but social media is still one of the best ways to connect to customers, and potential customers.  The changes they've made definitely make things harder on us, but not impossible.  It's not like they're charging us to even sign up for Facebook.  At least not yet...

Tuesday, September 11, 2012

Shame on Me for my Poor Social Media Skills :(

I have been so terribly lax in updating my blog.  Seriously, it's been months since I last wrote a word.  I'm starting to understand why people pay other people to do this sort of stuff.  Honestly, I've spent so much time in these last months working on the business aspects of things that I've hardly had any time to create new pieces.  (Note, I said hardly any time.  Like business-y stuff could keep me away from my work bench.)

And so, that's why I've been so horribly, terribly missing from the blog sphere.  I know, I know.  I'm awful.  I'll do better.  Honest I will.

Some really quick updates:

  1. I was accepted into Art in the Park!!
    • Art in the Park is a local juried art show.   It's been around for like ever, vendors and customers come from all over, and it's this whole big thing.  I applied for the first time this year and got accepted.
    • I attended the August show with much success.  Well, maybe not MUCH much, but I made enough to cover what I'd spent to attend, plus enough to cover the October show.  Which is fast approaching.
    • I'll be attending the October 6-7th show.  For more info, click HERE
     2. I finally (FINALLY!) at long last launched my very own website.
    • You should most definitely take a moment to check it out.  It's pretty great if I do say so myself.
    • Visit www.littlehilljewelry.com 
    • Oh, and sign up for my newsletter while you there.  I'm now sending those out about once every other week
     3. I'll be attending the Sept 22nd ONE Art Market in Burlington
    • I'm pretty pumped about this event.  It's a little smaller than Art in the Park, and indoors, but it should be a lot of fun.
    • If you're interested in attending, it takes place on Saturday, September 22 from 10-3 at 294 N. Winooski Ave in Burlington, VT.  Parking is available on site free of charge and there is a CCTA bus stop right outside the front door to the studio.
    • Check out their Facebook page for more info 
I guess that's all for now.  Oh!!  Be sure to check out my Etsy shop today!  It's my birthday, and I'm not gonna tell you how old I am, but I am offering a coupon code for 27% off your purchase TODAY ONLY!!  Use coupon code 27BDAY at check out.

There's some great new stuff up, so be sure to stop by, even if it's just to look around.

Happy Wednesday everybody!

Saturday, May 26, 2012

Sunshine and SEO


So it feels like it's been forever since I posted last.  Sorry for slacking my dear readers.  It's just that the weather here in Vermont has been so nice and sunny and I've kinda thrown myself into this whole SEO project...I know, I'm terrible.  Naturally you've all been wondering where the heck I've been and why I haven't updated (at least that's how the story goes in my head, so hush).

Since my last post, I've been doing a lot, and I do mean A LOT of work on search engine optimization (SEO).  That's the thing where you work on titles, tags, keywords, item descriptions and so on, making them more relevant and easier for search engines like Google to find and rank. 

Honestly, if they offered a class locally on this sort of stuff, I'd totally sign up, because it seems like there are about a billion million things to consider.  And if I had the money, I'd probably pay someone else to do it for me, because even after you think everything is just right, you're supposed to go back and tweak things every now and then to see if small changes make any difference.

You know, I say that, but the truth is I wouldn't want someone else to do it for me.  I feel this awesome sense of accomplishment after I've tweaked an item top to bottom and I see it show up better in searches and it gets more views.  I like knowing that I'm the one putting in the work, and that my hard work actually makes an impact.  It really is a great feeling seeing things improve and knowing that I did that.

This SEO stuff has taken up a ton of my time lately, but fear not, I haven't completely abandoned my right brain activities.  I've made a few fun new pieces for my summer line like these bracelets:

Natural Agate and Smoky Quartz Chainmaille Bracelet


Rainbow Fluorite Gemstone and Chainmaille Bracelet

Both these items will be available in my shop  starting June 1st.  Which is fast approaching.  I have so many more pieces I wanted to have ready for the "launch" of my summer 2012 line.  Guess that means I have a bunch more work to do :)

In other news, I've also been working on some promotional/branding material.  First up, the earrings cards.  Ones that I designed and printed and folded and punched.  The only way I could have been more involved in the process is if I made the paper myself and hand printed each card.  Which I would never do, because i totally don't have the patience for that. Here's a picture of the finished cards:

Homemade Earrings Cards
Oh, the earrings are a new design as well.  I think I really like the leaf and the font I used here--pretty sure that's officially my logo.

I also took advantage of a promotion through Etsy to get some free "mini moo" business cards from Moo.com.  They're smaller than regular business cards, thus the name, but they're just the right size for a simple picture on one side and the basic info on the other.  Check out the ones I got:

Mini Moo Business Cards

Sorry for the slightly out of focus photo--but you get the idea, right?  And I mean, how cute are these things?  They got here wicked fast too, I wasn't expecting them until June 4th, but the arrived first thing this morning (May 26th).  Pretty great.  And hey, if this inspires you to go out and get some Mini Moo cards of your own, or anything from Moo.com--please, pretty please click here 10% off first purchase

I earn points for referring people and you get 10% off your purchase.  Everybody wins!  :)

I think that's all for now.  Oh, it looks like I won't be doing the local farmer's market this year--they're all full up, and apparently have been since like, February.  I had no idea people signed up so early, so while I'm a bit bummed that I don't get to participate, I figure oh well--I'll know better for next year.  I think I'm going to do Art in the Park though.  At least I'm going to try...it's a juried event, so I'm at least going to submit an application.  We'll see how it goes.  It'd be so very cool to be accepted.  It's one of the premier craft shows in Vermont and people come from all over to shop and browse and meet local artists.  Even if all I did was make some great new contacts and pass out a whole bunch of business cards, I'd feel like I was a success.

I think that's all for now.  It's super hot here today, and the sun is shining.  I think I'll spend some time outside enjoying the beautiful weather.  Hope everyone has a happy and safe Memorial Day weekend!!

As always, thanks for reading :)