Showing posts with label Etsy. Show all posts

Wednesday, August 14, 2013

Paid Advertising for Your Handmade Business

Well, it's officially August, and summer is quickly coming to a close.  The nights are getting cooler, school is starting up again soon, and (like it or not) the holiday shopping season is right around the corner.

I've been promising an article on marketing and advertising for a long time, but, being the terribly lazy blogger that I am, I haven't got around to it until now.  This past month has been pretty hectic for me.  There was a mix up with the big summer retail show I do every year, and I didn't find out if I was accepted to attend until just 3 weeks before the show.  I usually have 3 MONTHS to prepare, so I had a ton of work to try and squeeze into those few weeks.  On the bright side, something about that kind of crazy pressure sparks my creativity like nothing else, and I manged to design and create a whole bunch of new items, some of which were so popular at the show that I spent down time during the show making more!! Here's one of my newest creations:
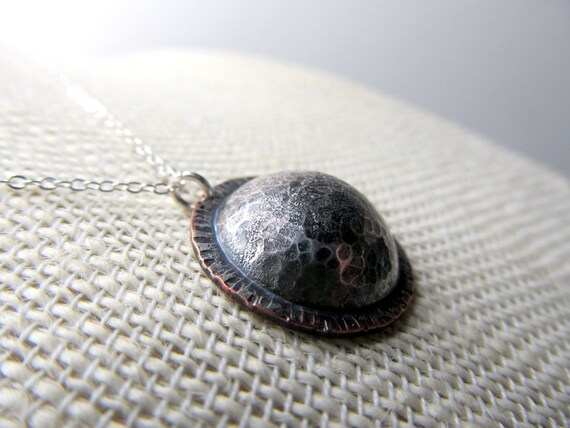
Midnight Moon Necklace

Anyway, the reason I bring up the show is because this year was a really strange year.  The art center that hosts the show didn't do much marketing--in fact the only marketing I saw was an email sent out a few days before the show.  Now, this is a large-ish show, with over 90 vendors plus food trucks, live music, and artist demos going on all weekend.  It happens twice every year, once in the summer, then again in the fall, and has been around for as long as I can remember.  It's a popular show, and usually draws a good crowd, even if the weather is yucky.  But none of that matters if people don't know the dates and time of the show, and that's where marketing and advertising comes in.

Now, I know a lot of people get really overwhelmed when they think about advertising and marketing, especially when it comes to paid advertising.  If you don't know what you're doing, you can end up throwing away buckets of money with very little return.  I'll go into more specifics about various advertising platforms in later blog posts, and even walk you through setting up a basic ad campaign, but for now, I want to share some really basic information with you to get you a little more comfortable with the idea of paid advertising.

The very first thing you need is a good, solid grasp on who your target market is.  If you recall, I did a guest blog post on the Promofrenzy Blog with lots of great tips, and a worksheet, to help you get to know your ideal customer, and your target market.  Etsy has a great blog post as well, full of great tips for finding your target market.

The next thing you need is a goal or a plan.  Figure out what you want your ads to achieve--Do you want more traffic to your online shop?  Do you want more traffic to your Facebook page?  Do you want more sales?  Do you want people to sign up for your newsletter?  

Being very familiar with the concept of your target market, and having a specific goal in mind will help you create effective ads that are geared towards the people who are most likely to buy your product (or like your page, or sign up for your newsletter).  The very first time I ran a Google AdWords campaign, I had no clue about my target market, and rather than narrow my audience down to a specific subset of people, I went wide.  In my mind, I thought the more people that saw my ad the better, but in reality, that was the least effective use of my ad budget.  Lots of views and clicks are great, but only if the people clicking/viewing are actually interested in your product.  Otherwise, you're paying for a click/impression that doesn't lead to anything, and that can burn through your budget quickly with very little to no return.

Wait, you say, what are clicks and impressions?  When it comes to paid advertising on the web, there are three common types of ads--Cost Per Impression (CPM), Cost Per Click (CPC), and Cost Per Action (CPA).  Choosing which of these set ups to use will largely depend on what the goal of your campaign is.  Here are some basic definitions:

Cost Per Impression (CPM):
The "M" in this acrynom doesn't stand for million, it's actually the Roman numeral for 1000.  CPM literally means cost per thousand.  A thousand what?  Impressions, or views.  With this type of ad campaign, CPM refers to the amount of money it will cost for your ad to be served (or shown) 1000 times.  If your ad budget is $50, and your campaign charges a CPM of $5, your ad will receive no more than 10,000 impressions--meaning 10,000 people will SEE your ad.

Cost Per Click (CPC):
With CPM advertising, you are paying to show people your ad.  They may or may not click on it, and once they've clicked on it, they may or may not buy, sign up, or take any other action.  With CPC advertising, you don't pay anything unless someone actually clicks on your ad, just as the name implies.  Once again, with a $50 budget, if your campaign charges a CPC of $0.50, you should expect to get 100 clicks. 

Now, along side 10,000 impressions, 100 clicks doesn't seem like that much.  But remember--we're talking about someone SEEING your ad versus someone CLICKING on your ad. 

Cost Per Action (CPA):
Cost per action is just what it sounds like.  If you've set up your ad campaign in this style, you only pay when your ad results in someone taking a specific action.  For example, someone clicks on your ad and signs up for your newsletter--you would pay for that action, but if someone clicked on your ad and didn't sign up for your newsletter, you wouldn't pay anything.  I've found this type of advertising to be expensive, so while it may be the most direct advertising link between customer and business, it's not one I have much experience with.

So that leaves 2 very common options for your online advertising: CPM and CPC.  Which is better?  This is a hotly debated topic, and the world of online advertising is full of opinions on which is better, more cost effective, and has a better ROI (return on investment).  But I've found that both CPM and CPC have their place in advertising for my small business.

While you're trying to decide on which type of advertising will work best for your goals, there are some other important factors to keep in mind.  One of the biggest is keywords.  Keywords are what determines if and where your ad will be shown.  For those of you already familiar with SEO, coming up with relevant keywords for your ad should be pretty easy.  If you use multi-word tags in your Etsy shop, you've pretty much done the work already. 

When setting up an ad campaign, each individual ad should be limited in the number of keywords you use, and they should be specific and relevant to whatever you're advertising.  Whatever venue you're setting up your ad campaign on, using the Google AdWords Keyword Tool can be a huge help.  This is a tool that lets you see what kind of traffic certain keywords and phrases generate.  This requires a bit of research and experimenting to find what works for you.  It's important to remember that just because a keyword gets lots of traffic doesn't necessarily mean it's a good fit for your ad...or for your budget.  The more popular the keyword, the more it costs, which is something I'll go into later.  For now, here's a quick example:

In this screen capture, you can see a sample keyword search.  I chose jewelry.  This page provides you with a TON of great info.  Starting at the top, under "Keyword Ideas", you can see my search term "jewelry".  As you move across that row, there is a little graph symbol which will show you monthly searches for the keyword over the last 12 months when you hover over it.


On this graph, you can see that the search term saw a spike in relevant searches starting in October.  To the right of this graph, you can see the average number of monthly searches for this word.  This will tell you how popular the keyword is.  Immediately to the right of that is the "Competition" column.  For the search term "Jewelry", this tool says competition is high, meaning that lots of advertisers across Google and its networks are bidding on and using this keyword.  The higher the competition, the more you'll have to bid to "win" a place for your ad in searches using this keyword.  Finally, the Keyword Tool lists an average CPC.  For this keyword, the average cost of 1 click is nearly $2.  That'll eat up a $50 budget very quickly, which means the keyword may not be a good fit.

But even if the keyword you initially look into isn't a good fit for your ad/budget, the Keyword Tool has some great options to help you find a word or phrase that is.  Below the initial results, you'll see a long list of suggested keyword phrases that include your initial keyword.


This list will provide you with the same information regarding these keyword phrases--a graph, average monthly searches, competition, and an average cost per click.  Going through this list is a great way to find other keywords that you maybe hadn't thought of using, and it allows you to finds words/phrases that work for your ad and budget.  Ideally, you want to select keywords and phrases that have good traffic, medium to low competition, and an average CPC that fits your budget.  Remember, this Keyword Tool provides information for how ads perform on Google and its networks.  While this is a good basis for research, it's important to keep in mind that keyword competition and CPC can vary across advertising platforms.

Over the next few blog posts, I'll walk you through setting up some ad campaigns on three different platforms.  We'll look at Etsy Search Ads, Facebook Ads, and Google AdWords.  Etsy Search Ads are the easiest to set up, so we'll look at those first.  There are several different options for Facebook Ads, including building your Business Page Audience (likes), boosting a post so more of your audience sees it, and using Facebook to advertise your shop/business website.  Google AdWords is probably the most complicated and expansive advertising option we'll discuss, and I definitely won't be able to cover everything, but I'll do my best to get you started.

In the meantime, here's a little homework.  Start brainstorming information you would need to set up an ad.  
  • Think up a goal, or a set of goals.  
  • Figure out a budget.  
  • Be sure you've taken the time to get to know your target market.  
  • Start researching keywords you might use in an ad
    • If you have an Etsy shop, take a look back at what keywords have brought the most traffic to your shop, and start researching these keywords to see what might be a good fit
    • If you don't have an Etsy shop, that's okay.  Just make a list of words and phrases you might use to find your product in a Google search, and research them
I suppose that's all for now.  If you have questions about things covered in this blog post, please feel free to ask in the comments below :)  If I don't know the answer, I'll find it, or do my best to point you in the right direction to find it yourself.

Until next time, 
Happy Making!


Wednesday, April 10, 2013

Let's Talk about Facebook (Part 1 of 2)

There are so many social media options out there, and keeping up with all of them can be a daunting task.  It's hard to know where we should be concentrating our efforts, and it's even more difficult to know if our efforts are even paying off.

I use several different forms of social media, including Twitter, Pinterest, Wanelo, StumbleUpon, Blogger, and Facebook.  They all have they're good and not-so-good points, and they've all brought traffic to my shop in one form or another, but of those listed, Facebook is my favorite.


I know that might seem odd to a lot of folks out there.  And really, it is a little, because Facebook definitely isn't my highest source of traffic.  But Facebook brings things to the table that no other social media site really does: The ability to interact directly with your fan base. 

I find Facebook to be a happy balance between the impersonal and uber personal.  It gives your fans a chance to interact easily, it allows you to present both visually and verbally, and perhaps most importantly, it allows you to build connection.

So what's the secret to using Facebook successfully?  I'm not sure there is one. Below you'll find some helpful (if boring) statistics, followed by some great tips and tricks from users just like you

According to some social media experts, there are key times that small business should be taking advantage of to post, but aren't.  A report based on 1,800 of the world's biggest brand pages showed that while "weekend posts get 69% higher interactions, only 11% of posts are published on Saturday or Sunday."  In other words, posting on the weekend reaches way more people than during the week, but the average business fails to take advantage of the increased audience.  Not all industries follow the same pattern though--Thursday is actually the biggest day for clothing and fashion, and Monday is the biggest for general retail.

The same study also shows:
  • Wednesday's interactions average 7.4% lower than any other day--so if you're gonna skip posting, today's the day
  •  Posts between 8PM and 7AM see a 14% higher rate of interaction
  • Less is more--brands that post 1-2x a day see a 19% higher rate of interaction.  Posting more than 4 times a day can actually result in being seen less due to the penalty imposed by FB's Newsfeed Optimization
  • Video and link posts see far less than average traffic, making them the least effective means of promotion
  • Photos see 39% more interaction, making them the most effective
  • Using emoticons like :D and :P is good for business--posts that do receive a 52% higher rate of interaction than posts that don't
  • Using a call to action (commands like "caption this", "Like", "Share", or "True or False") garners a 48% higher than average interaction rate
Now that all that boring (but important) statistical info is out of the way, let's take a look at a few questions and tips from some great Etsy users.  (More Q&A and tips in next week's post)

Some folks in my most favorite Etsy team  had questions about setting up and posting from a business page on Facebook, so I thought I'd start there.  To set up a business page, simply scroll to the bottom of any page on Facebook while logged into your personal account, and click "Create a Page".  You'll be presented with a screen that looks like this:

When I set up my page for Little Hill Jewelry I chose "Brand or Product" because it was the best fit for my business.  Take some time and check out all the options before deciding--some might be a better fit than others.  Once you've chosen, Facebook will walk you through setting up your page.  Keep in mind that while you are the admin of the page, people viewing your business page won't see your personal profile.  This is ideal for folks who really want to keep their personal lives separate from their business lives.

Once you've got your page all set up, it's time to start posting (we'll get to what to post in a minute).  Because you must be logged into your personal account to have access to your business page, it can sometimes get confusing trying to figure out where your posting from.  

When you're looking at your news feed from your personal account, on the left hand side running down the screen is a sort of directory to all the places you might need to go on FB.  Once you've created your business page, you should see it over here in this tool bar.  If you click on your business page, it will bring you to your Admin Page, where you can gain insight to your page, post as your business, and just generally manage your this area.

If you go to your business page this way, anything you post on your business page will be posted from your business page.  However, if you navigate away from here, say, to a friend's profile, you will no longer be posting as your business page.

If you want to post elsewhere on Facebook as your business, there are a few really easy steps to take to do so.


In the upper right hand corner of your screen on your personal account, there's a little gear shaped icon.  Clicking on that will drop down a menu with some managing options.  If you want to switch from posting from your personal account to posting as your business, simply click on the top option in this drop down menu "Use Facebook as (insert your business page name here)".  Once you click on that, everything you post on Facebook will be posted from your business page, no matter where you go.  Switching back is just as easy, simply click the little gear again, and select your personal page as the "user".

Now, it can get a little confusing, remembering who you're posting as.  If you click the page icon on the left of the screen, the top of your admin page will look like this:
See how in the upper right it still says my name?  If I navigate away from my business page, I'll be posting as myself.

If, however, you switch over using the drop down menu on the upper right, this is what the top of your admin page will look like:
See how it says "Little Hill Jewelry" in the upper right?  Now no matter where I go, I'll be posting as my business page.

A few common question I see while lurking in the Etsy forums are:
  1. What should I post?
  2. How do I gain followers?
  3. How do I get my followers to interact?
From: CrownAndCole: TRAVELER necklace
Steph from CrownAndCole suggests:

"Think about the kind of audience that your brand attracts and then think about what interests them. For example, if you specialize in making all-natural soap, your audience might also be interested in organic eating, or other all-natural products. Post about these things! Did you spend the weekend camping? Post some great scenic photos. Did you find a great all-natural product (that is not your competition!) - post about it! Posting things that your audience might be interested in is a great way to increase traffic to your FB page, thereby gaining exposure for your business."

I think her response kind of covers all 3 common questions.  By posting about things that are both important to you, and interesting to your target audience, you make yourself and your brand memorable and forge connections with with genuine fans.  If all you ever do is post links to your newest Etsy listing, people will probably scroll right by you in their news feed.  But if you can engage them, involve them in your work, life, and process, you'll make a lasting impression.  And when they think "Oh hey, I need _________" your name might come to mind really quickly.


Another way to gain followers is to run a Facebook ad.  This may seem like an expense you're not really interested in, but it can gain you a lot of followers in a short time for very little money.  

From: NancyKayCreations: Black Donut Shell Bracelet


Nancy Mare from  NancyKayCreations says: "I've had good success with the ad feature.  You can set your own price, so it doesn't cost too much."  And she's right, you control everything about your FB Ad, from how much you spend, to who sees it, to when it's shown and where it links to.  I've run ads to build up my followers list, and I've run ads that link directly to my Etsy shop.  Both helped me grow as a business.


Next week, I'll post some more great tips and tricks from Etsy users, and go a little more in depth on some of the ones I think are key to success using Facebook.

A BIG thank you to all the great Etsians who responded to my thread!  I wish I had room to add photos from all of your wonderful shops!!  If you have some time, be sure to check out the shops of those who contributed to this week's (and next!) blog post!! 

Tuesday, March 19, 2013

Springtime and Cheesecake

 Cheesecake?  Yes, cheesecake, because not every entry can be about jewelry =P

A quick update...Things are going pretty well for Little Hill Jewelry.  I'm still terrible at remembering to update this blog, so I'm sure there are tons of things that have gone on that I should mention, like my gifting a few celebrities, and revamping my website. I'm also working on some new items for spring/summer, but you can see those sneak peeks over on my Facebook page.

It's snowing here in Vermont, which is cool and everything, but the first day of spring is like, a day away, and we've got 8 inches of icy, wet snow on the ground.  Thank goodness for the internet, and my awesome Promotional Frenzy team members over on Etsy--check out some of their spring themed artwork!

This is a stunning photo of Cherry Blossoms in Snow from HausofAriella 
A wonderful print of a blossom against blue sky from NewCreatioNZ
A pretty floral headband from NewEnglandQuilter
And a beautiful brass flower pendant from KapKaDesign


So I thought I'd change things up a little this post, and share my new and ridicilously fantabulous recipe for cheesecake.  Yes, I said cheesecake.  I'm obsessed with cheesecake, but don't eat it often, because desserts aren't generally the healthiest thing on the planet.  Now, don't get me wrong, this cheesecake probably shouldn't take up residence in your daily food pyramid, but it's just perfect for a special treat that won't weigh you down.

I wish I'd thought of it while I was cooking and snapped a few photos, but food-blogger I'm not, so it didn't occur to me.  I know reading a recipe with no pictures is endlessly boring, but believe you me, it's totally worth it!  I know, I know, enough babbling on...here's the recipe!


Totally Awesome and Almost Fat/Sugar Free Lemon Cheesecake

Ingredients:
For the crust:         13/4 C Nilla Waffer Cookies, crushed fine
                              ¼ C unsalted butter, melted
For the Filling:      (3) 8oz packages of fat free cream cheese
                              1C fat free sour cream
                              2C Splenda (or other preferred sugar substitute)
                              3 large eggs
                              2t lemon zest
                              2T lemon juice
For the Topping:   11/2t lemon zest
                              6T lemon juice
                              1 large egg, plus 1 large egg yolk
                              1/2C Splenda (or preferred sugar substitute)
                              2T unsalted butter, cut into small bits

Instructions:
  1. Preheat oven to 325o
  2. Mix cookie crumbs and melted butter until crumbs are evenly coated.  Press crumbs evenly into the bottom of a prepared 9” springform pan. 
    • Don’t have one?  No big deal, you can really use any pan you like so long as it’s comparable in size.  I like the springform pan because the sides pop off, which makes removing the cheesecake a breeze.  If you’re going to use just a regular 9x9” square pan, I suggest lining it with parchment paper, just to save yourself headaches down the line.
  3. Bake crust in preheated oven for 8-10 minutes (I left mine in for 12)
  4. Remove pan from oven and let cool on a wire rack while you prepare the filling
  5. Using a hand or stand mixer, cream together the cream cheese and sour cream. 
    • This is way easier to do if the cream cheese has been hanging out on the counter for a bit.  I took mine out about an hour before I got started, and it was the perfect consistency.
  6. Add eggs one at a time, mixing until just blended.  Then gradually add the Splenda, mixing well.  Finally, add the lemon zest and juice.
  7. Pour filling into the crust and smooth.  Now you’re ready to bake it!
    • Okay, so here’s the thing.  Even full fat/sugar cheesecakes can crack on the top while their baking.  It’s just what cheesecakes do.  By changing the chemistry of the cheesecake (fat free and sugar substitutes), this is actually way more likely to happen.  Fear not, there is a trick to help prevent this!   
    • When you put your cheesecake in the oven to bake, add a small pan of water on another rack.  I bake my cheesecake on the middle rack, with a Pyrex dish with about 1 ½ cups of water on the rack above it.  This creates a moist heat environment, which helps keep the top of your cheesecake from getting all dry and cracked.  But, ya know, even if it does crack, it’s not like it effects how yummy this cheesecake is :)
  8. Bake cheesecake.  How long is really going to depend on your oven, and your environment, and how the food gods are feeling that day.  Generally speaking, it’s going to take between 1 hour 25 minutes and 1 hour 45 minutes.   
    • Normally with cheesecakes, you take it out when the tops starts to get that lovely cream and brown glow to it.  Since we’re using Spelnda, that’s not going to happen (Splenda doesn’t caramelize like sugar), so you have to keep a really close eye on it.   
    • The cheesecake is done when the top looks dry and the center is only slightly jiggle-y when you gently shake the pan.  It’s part science, but mostly magic and instinct.  The cheesecake is going to continue to set up after you take it out of the oven, so a little jiggle is a good thing.
  9. Once the cheesecake is done, take it out and let it hang out on a wire rack while you make the topping.
  10. The topping is basically lemon curd.  It’s tart, sweet, and lemon-y, and it’s not strictly necessary to make this cheesecake, but it is a great finishing touch.
  11. Set up a double boiler.   
    • If you don’t have one, you can improvise like I do and just set a heat safe bowl over a pan of simmering water.  Make sure the bowl doesn’t touch the water, and that steam can escape, and you’re all set.
  12. Add the zest, juice, Splenda, egg, and egg yolk to the bowl and set over simmering water.  Whisk until the mixture is hot and frothy, about 5 minutes.  You really have to whisk constantly to keep the eggs from curdling. 
  13. Once the mixture is hot and frothy, gradually add the butter bits, whisking until each addition melts.  Once all the butter is added, whisk constantly for about 7 minutes until the mixture is smooth, glossy and coats the back of a spoon.  Remove from heat and cool for about 30 minutes, stirring occasionally.
  14. Remove the cheesecake from its pan to a serving plate.  If using a springform pan, run a thin knife around the edge to loosen, and then just pop off the sides, then gently slide the cheesecake onto a flat plate.
  15. Top the cheesecake with the lemon curd.   
    • Be sure to do a little taste test of the topping before slathering the cheesecake with it.  It is lemon curd after all, and can be a little tart.  I only ended up using about 2/3rds of the topping spread thinly along the top.
  16. Let the topped cheesecake hang out at room temperature for another 30-45 minutes, and then place in the fridge for several hours, or overnight.
  17. I totally didn’t wait several hours.  More like—barely an hour.  You just want to chill the cheesecake and make sure everything is nice and set before you cut into it.  Try and hold off as long as you can.
  18. Top with fresh raspberries for a fresh burst of color and dig in!  The only fat is from the butter in the crust and topping, and the only sugar is from the cookie crumbs in the crust, making this almost fat and sugar free, and totally, deliciously, diet friendly.
And that’s all there is to it.  Try it out, and let me know in the comments what you think!
Ta ta for now :)